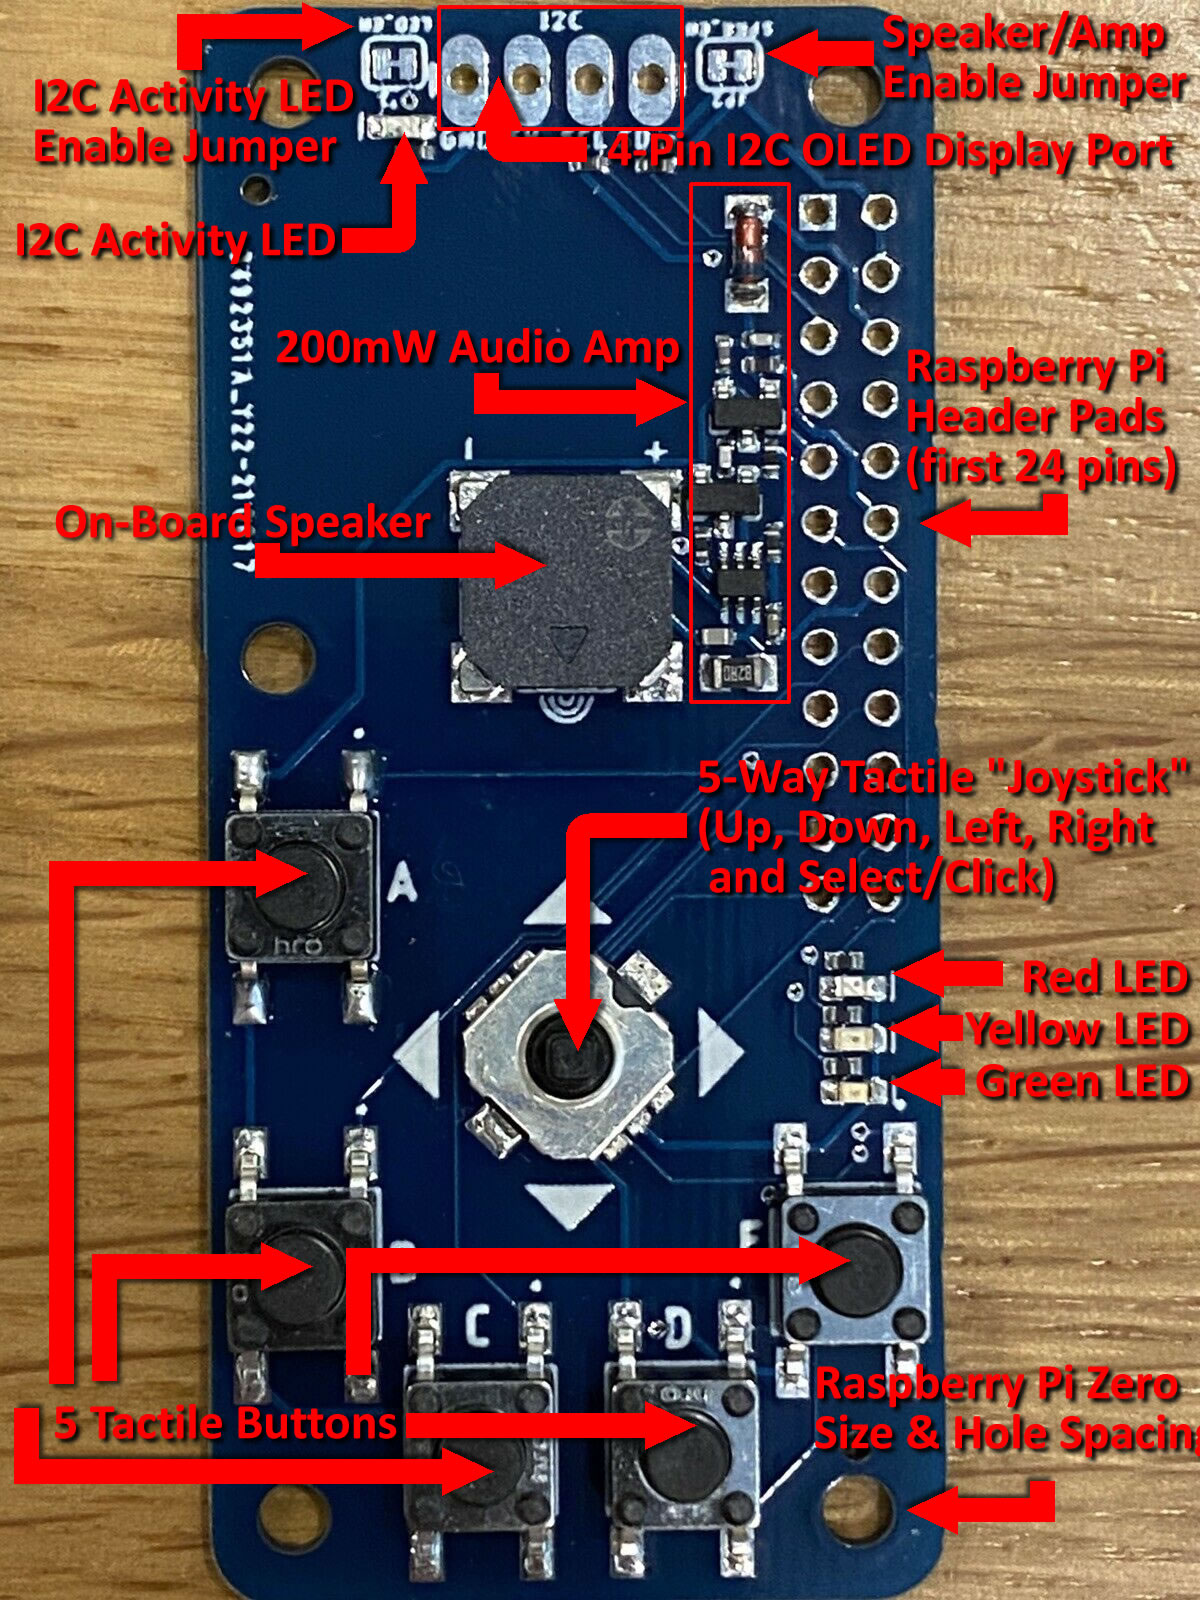
This PiHat allows you to add your favorite I2C Display to an awesome little piZero-sized board which has a 5-Way Joystick, 5 Tactile Buttons, 3 LEDs (Red, Yellow, & Green), as well as a powerful little 200mW amplifier with ON-BOARD speaker (which is actually quite loud) to your Raspberry Pi!
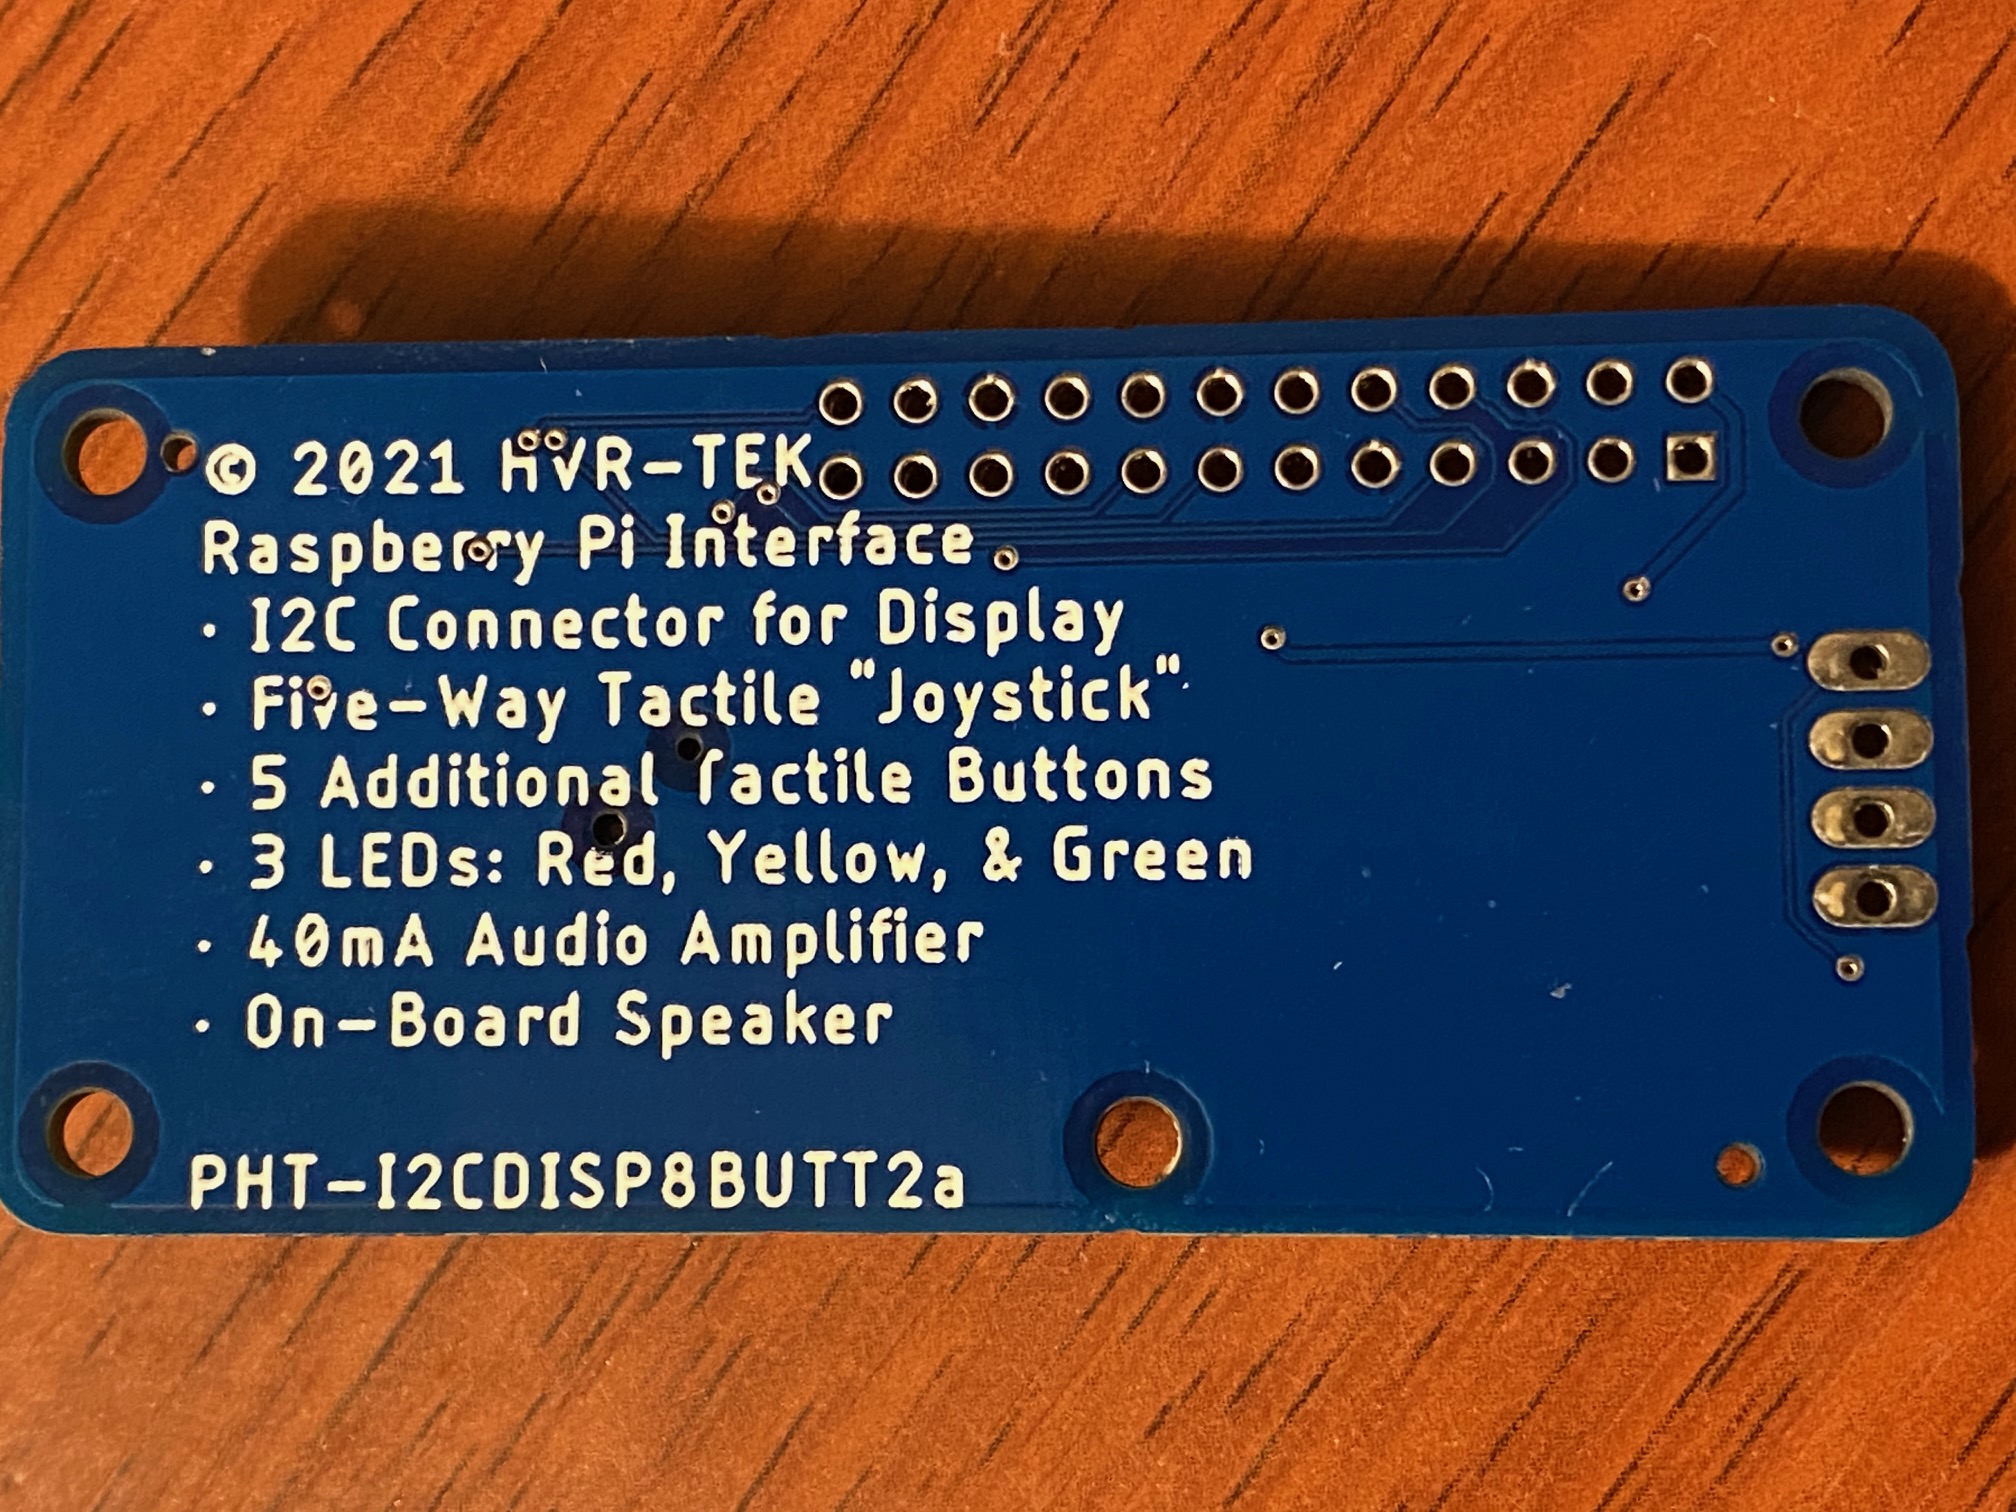
Features:
- Plugs directly on to any Raspberry Pi using the 1st 24 GPIO pins (1-24). Just solder on the two included 2×6 (12-pin) Female 2.54mm Headers.
- Identical board size as Raspberry Pi Zero (and Zero-W): 30mm x 65mm, with rounded corners for perfect mating. Add 11mm spacers and/or M2.5 screws if you want to distance it from your pi zero.
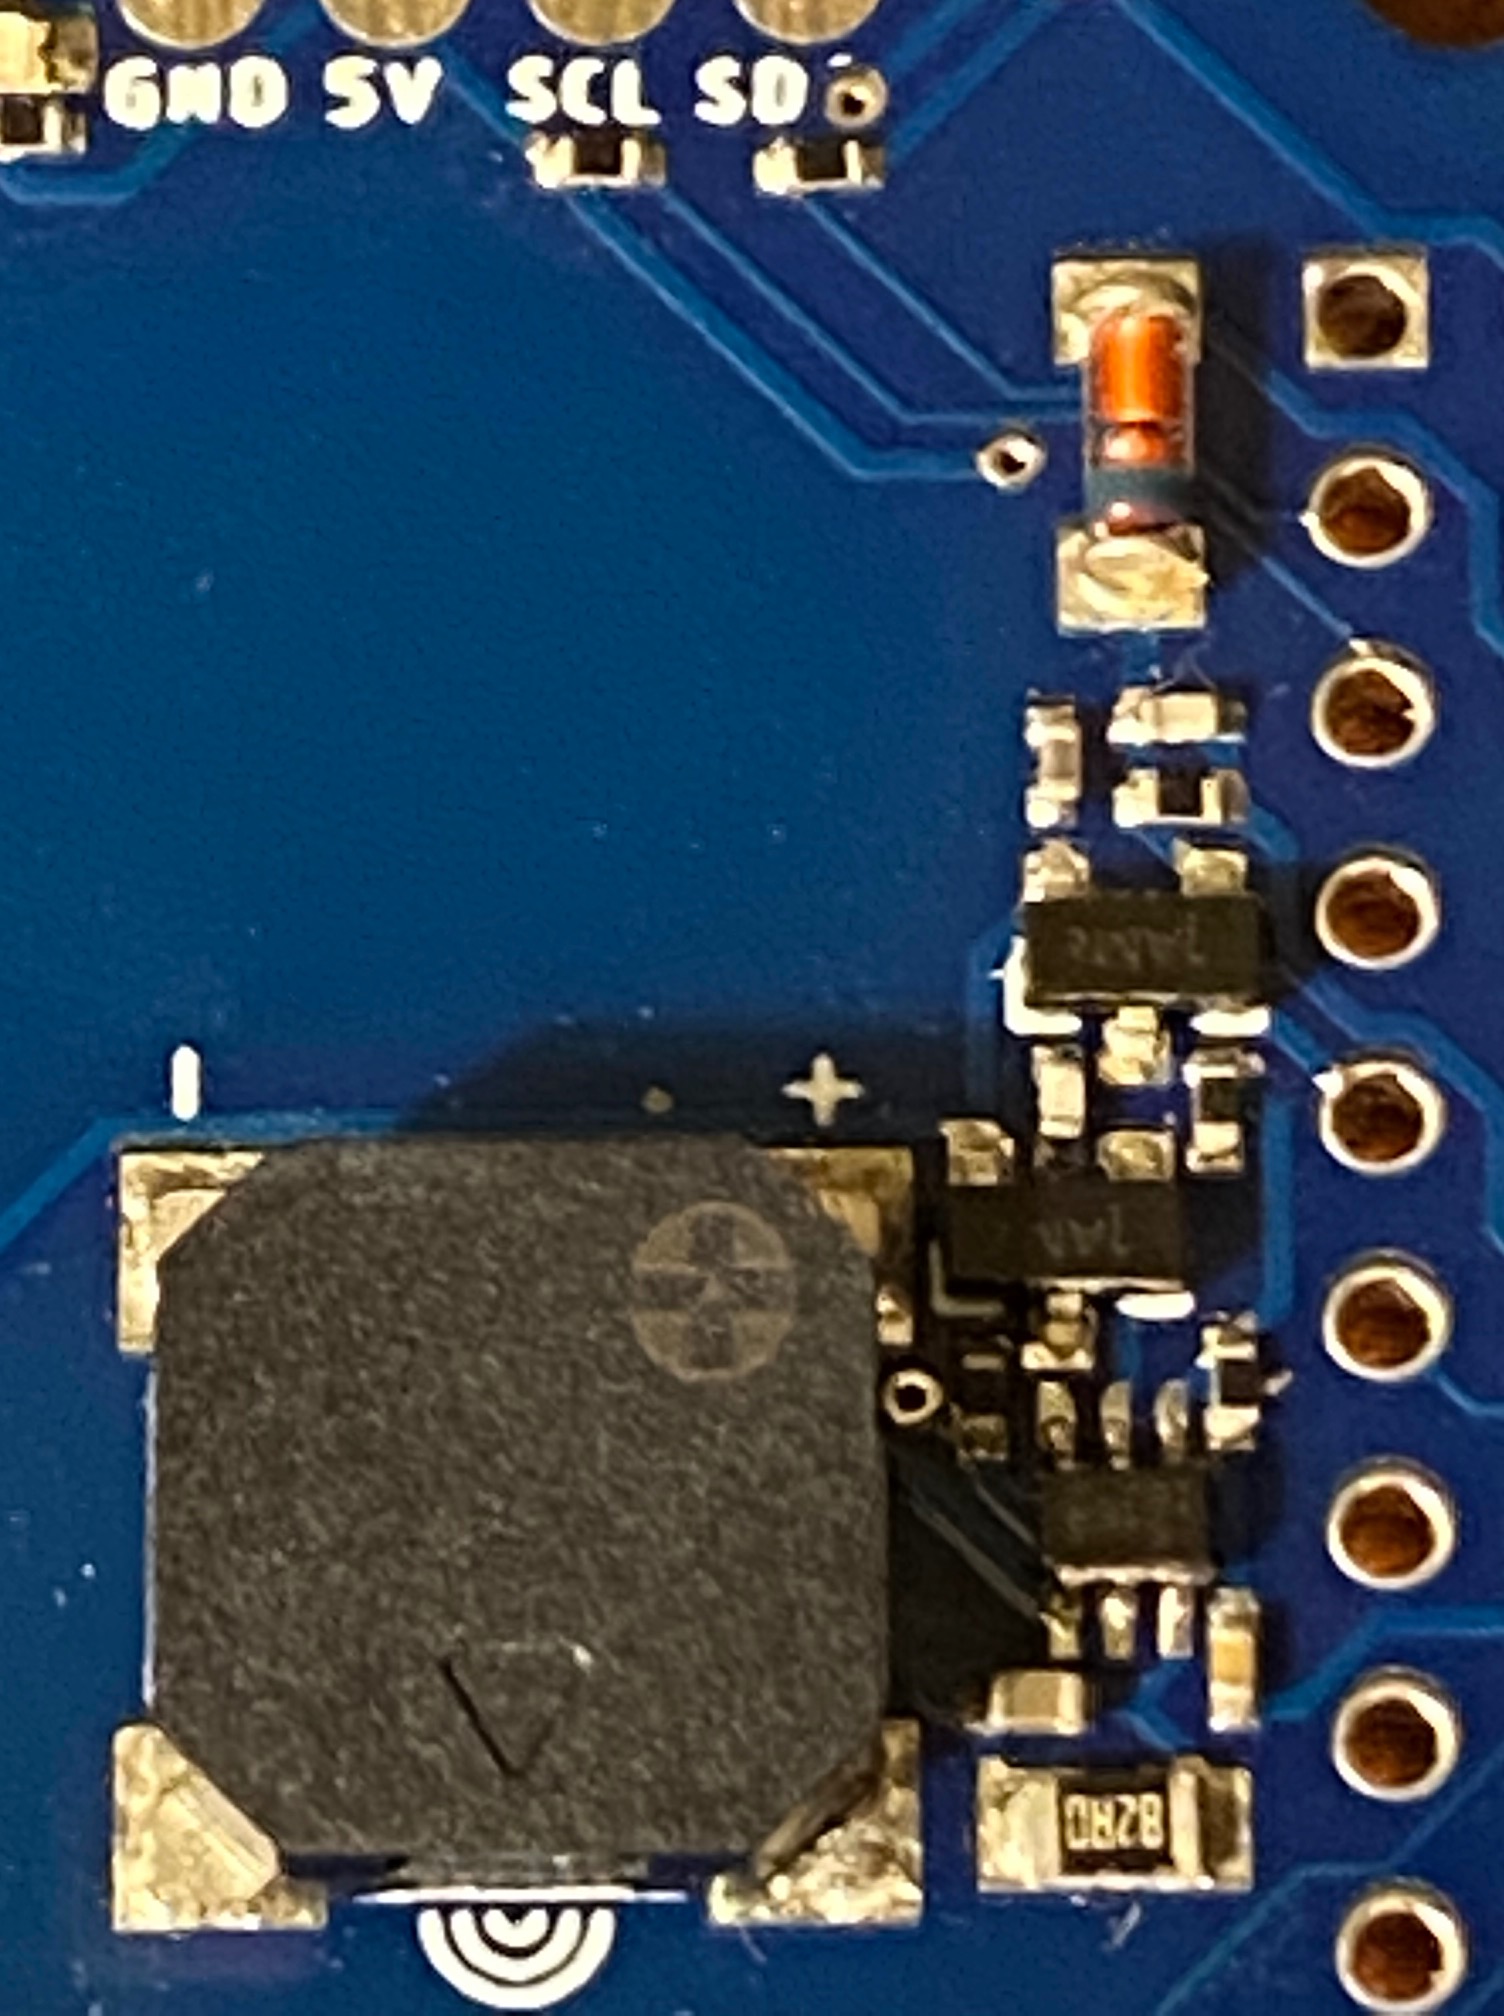
- High-quality 200mW Class-D Fully-Differential Audio Amplifier directly powering an On-Board 16Ω 8.5×8.5×3.0mm SMT Speaker mounted directly below your I2C Display. Excellent volume and quality. Fully compatible with standard Raspberry Pi Linux PCM Driver.
1. Just add the following 2 lines to your /boot/config.txt:
dtoverlay=audremap,pins_18_19
audio_pwm_mode=2
2. After you reboot, you will see it listed as an audio device:
aplay -l
card 1: Headphones [bcm2835 Headphones], device 0: bcm2835 Headphones
3. Then use it as a standard audio/headphone device:
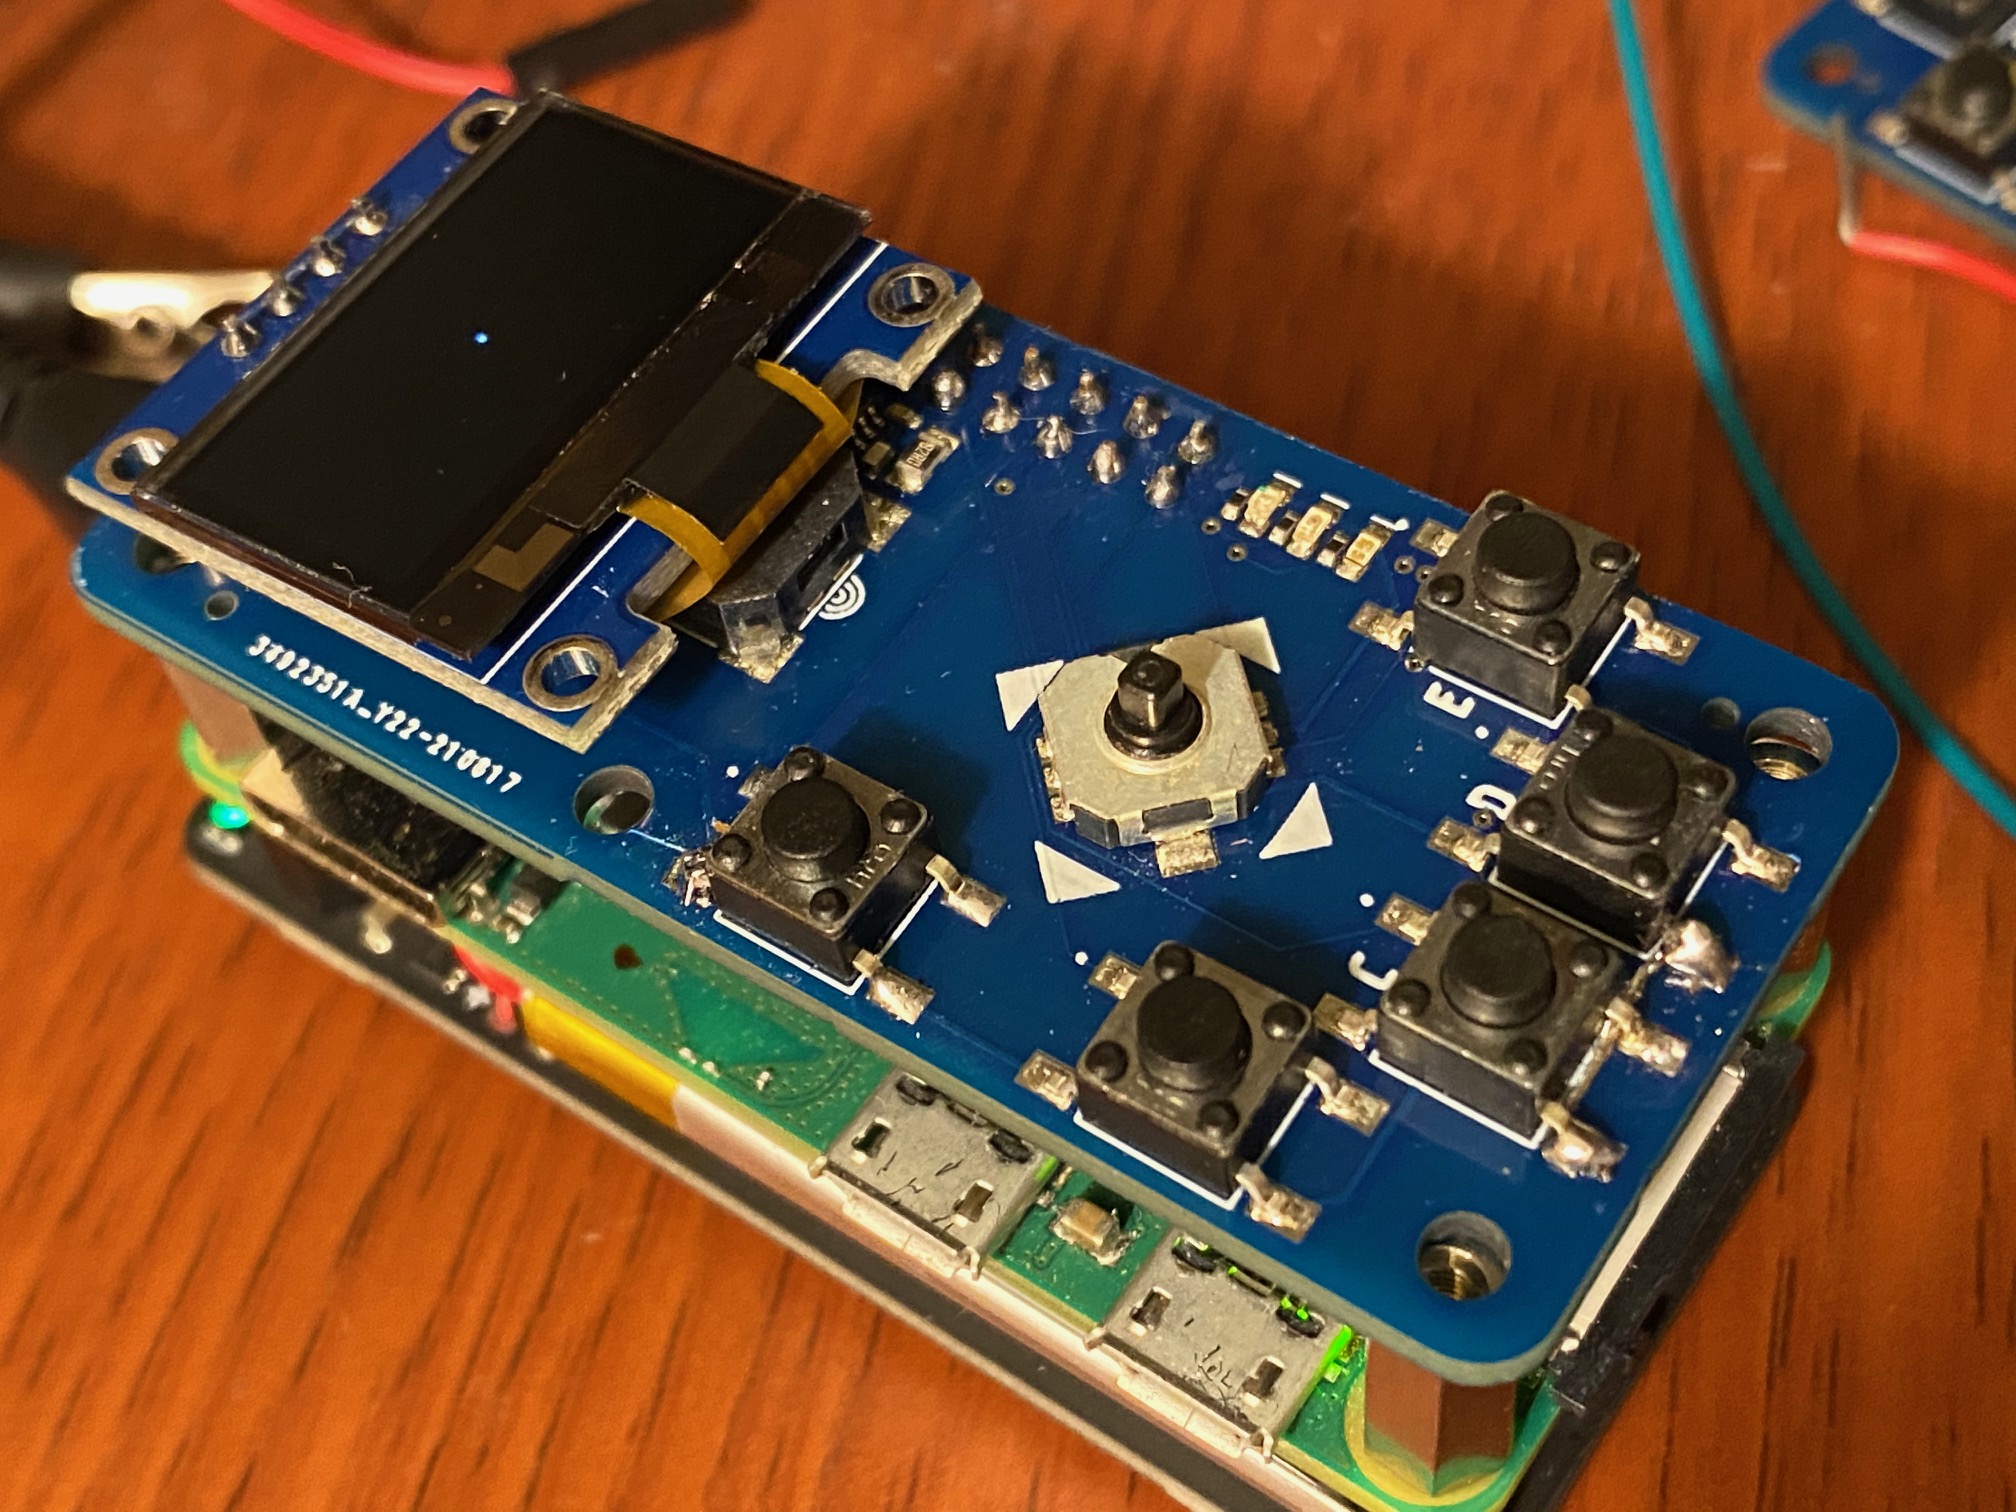
aplay -D plughw:1 filename.wav - Easily solder on most any OLED I2C Display (i.e. 128×64 pixel) into the Standard 4-Pin Port: [GND – 5V – SCL – SDA]. Each display is slightly different size, so mounting holes will be approximate. But 4 solder-pins hold it securely and it lays right over the speaker nicely.
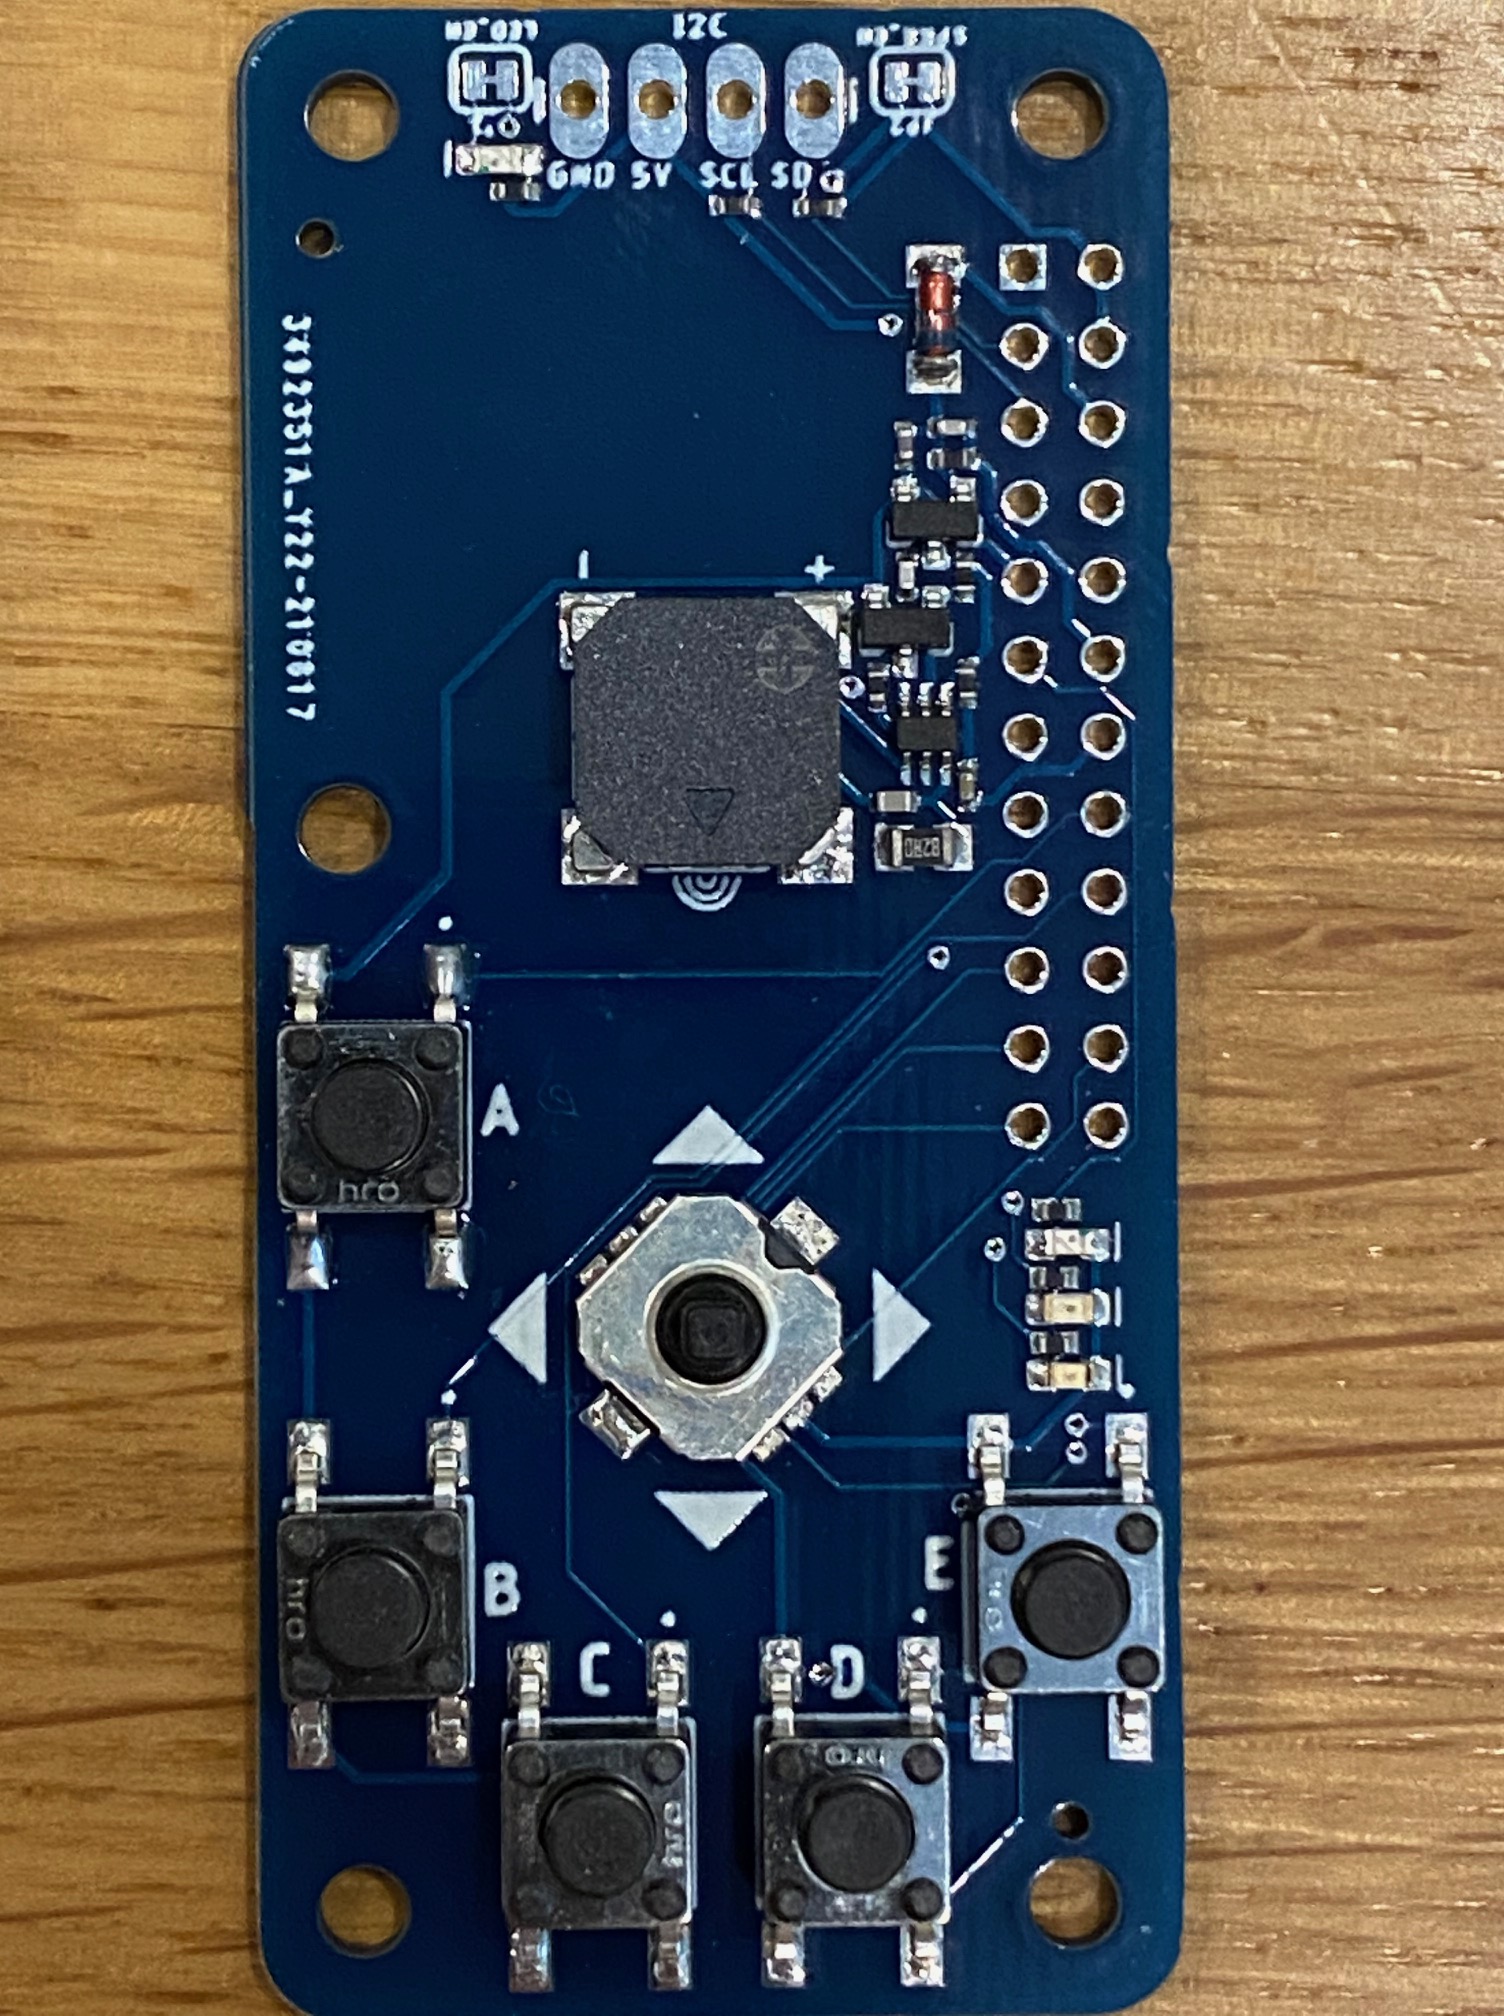
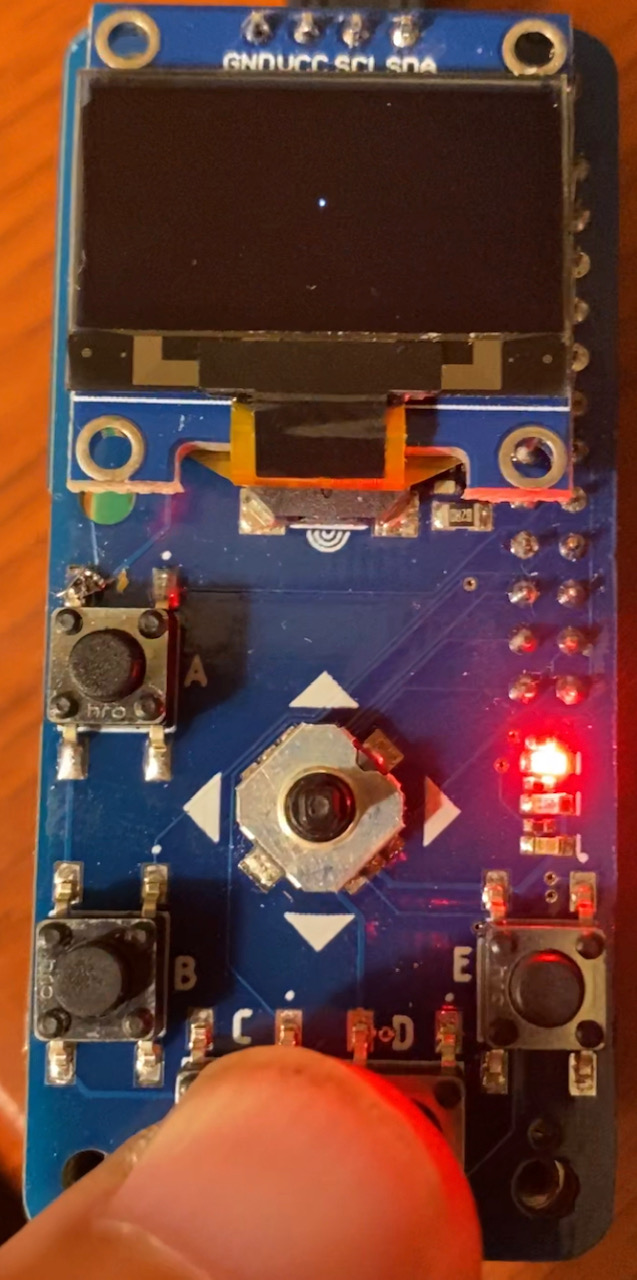
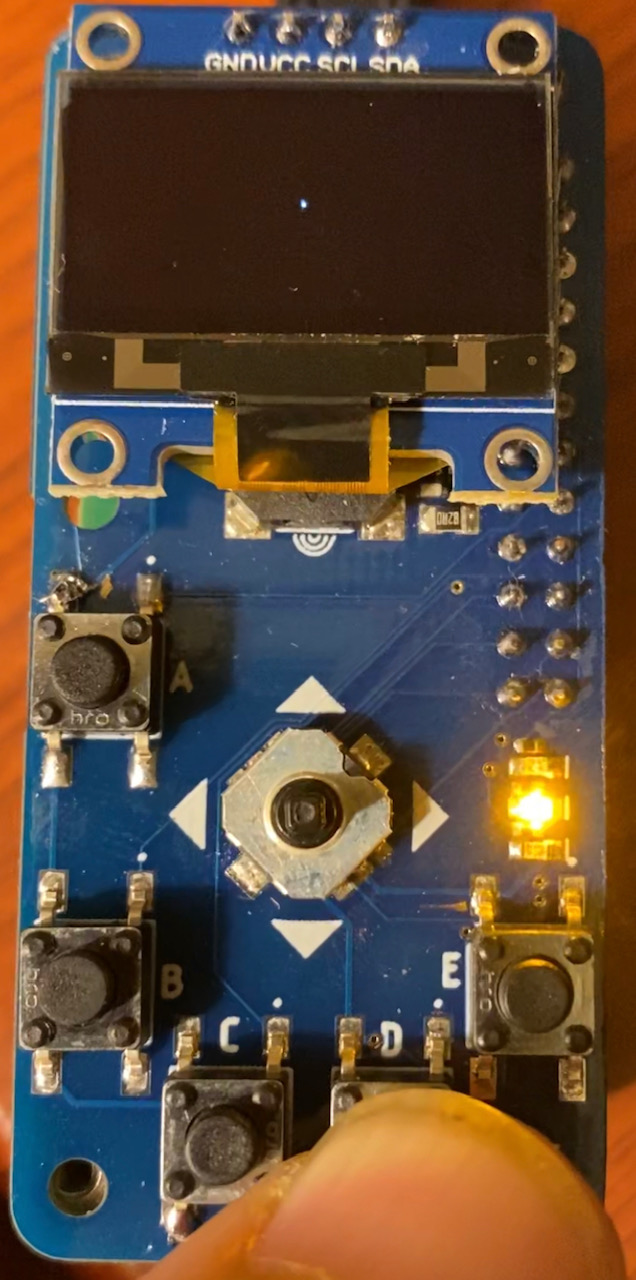
- Three Bright LEDs: Red/Top (GPIO17), Yellow/Middle (GPIO27), & Green/Bottom (GPIO22).
- Five-Way Joystick: Left (GPIO11), Right (GPIO25), Up (GPIO10), Down (GPIO8), and Center/Click (GPIO9)
- Five additional 6.0×6.0x4.5mm Tactile Buttons: A/Top-Left (GPIO23), B/Left (GPIO24), C/Bottom-Left (GPIO14), D/Bottom-Right (GPIO15), and E/Right (GPIO4)
- Just configure rPi’s GPIO pins as input, with internal Broadcom Pull-High resistors. Add approx 10ms debouncing in your Python/Java/C program for button presses.
- Includes additional on-board I2C Status LED (in addition to main 3 LEDs) next to i2C header showing i2C traffic/signals.
- Dark-blue-colored board to match most OLED display boards
- Schematic included (see photos)
GPIO Pins:
1: 3V3
2: 5V
3: GPIO2/SDA
4: 5V
5: GPIO3/SCL
6: GND
7: GPIO4: E
8: GPIO14: C
9: GND
10: GPIO15: D
11: GPIO17: RED LED
12: GPIO18/PWM0 (Amp/Speaker)
13: GPIO27: YELLOW LED
14: GND
15: GPIO22 GREEN LED
16: GPIO23: A
17: 3V3
18: GPIO24: B
19: GPIO10: UP
20: GND
21: GPIO9: CENTER
22: GPIO25: RIGHT
23: GPIO11: LEFT
24: GPIO8: DOWN
Sample node.js program using all features (used for demo video above):
// Load libraries
const i2c = require('i2c-bus'),
  i2cBus = i2c.openSync(1),
  oledi2c = require('oled-i2c-bus'),
  font = require('oled-font-5x7'),
  fontPack = require('oled-font-pack'),
  pngtolcd = require('png-to-lcd'),
  Gpio = require('onoff').Gpio,
  exec = require('child_process').exec
// Configure I2C Display Options
var opts = {
  width: 128,
  height: 64,
  address: 0x3C,
}
var oled = new oledi2c(i2cBus, opts)
// Create GPIO Objects for 3 on-board LEDs
const led_red = new Gpio(17, 'out', 0),
      led_yellow = new Gpio(27, 'out', 0),
      led_green = new Gpio(22, 'out', 0)

// Create GPIO Objects for 5-way joystick and 5 tactile buttons
const buttons = {
  up: {bcm: 10},
  down: {bcm: 8},
  left: {bcm: 11},
  right: {bcm: 25},
  center: {bcm: 9},
  a: {bcm: 23},
  b: {bcm: 24},
  c: {bcm: 14},
  d: {bcm: 15},
  e: {bcm: 4}
}
// For each button: set as import with pull-up resistor, add 10ms debounce, and link to doButton function
Object.keys(buttons).forEach(button => {
  exec(`gpio -g mode ${buttons[button].bcm} up`)
  buttons[button].gpio = new Gpio(buttons[button].bcm, 'in', 'both', {activeLow: true, debounceTimeout: 10})
  buttons[button].gpio.watch((err, value) => doButton(button, value))
})
// set up default X & Y locations for drawing, and clear screen
var x=Math.abs(opts.width/2), y=Math.abs(opts.height/2)
clearScreen()
// Handle all button presses
function doButton(buttonName, value) {
  //console.log(buttonName, value)
  // draw pixels for 5-way button
  if (buttonName === 'up' || buttonName === 'down' || buttonName === 'left' || buttonName === 'right') {
    if (value) {
      doPixel(buttonName)
      buttons[buttonName].intervalTimer = setInterval(() => {
        if (buttons[buttonName].gpio.readSync()) doPixel(buttonName)
        else clearInterval(buttons[buttonName].intervalTimer)
      }, 30)
    }
  }

  // play a simple sound for 5-way center-click
  // (http://thecyberbuddy.com/sounds/samtwitch.wav)
  if (buttonName === 'center' && value)
    exec('aplay -D plughw:1,0 samtwitch.wav')
  // say time if button A is pressed (for less than 2 seconds)
  // or clear screen if button A is held for 2 sec
  if (buttonName === 'a') {
    if (value)
      csTimer = setTimeout(clearScreen, 2000)
    else if (typeof csTimer === 'object' && !csTimer._destroyed) {
      clearTimeout(csTimer)
      sayTime()
    }
  }

  // halt (shutdown) if button A is held for 5+ seconds
  if (buttonName === 'a') {
    if (value) haltTimer = setTimeout(() => {
      console.log('halt')
      if (buttons[buttonName].gpio.readSync()) halt
    }, 5000)
    else clearTimeout(haltTimer)
  }

  // Display a message for button B
  if (buttonName === 'b' && value)
    oled.writeString(font, 1, 'This is SO COOL!\n', 1, true)
  // turn on & off LEDs with buttons C, D, and E
  if (buttonName === 'c') led_red.writeSync(value)
  if (buttonName === 'd') led_yellow.writeSync(value)
  if (buttonName === 'e') led_green.writeSync(value)
}
function sayTime () {
  var say = "Today is "
    + new Date().toLocaleDateString('en-Us', {day: 'numeric', weekday: 'long', month: 'long', dayPeriod: 'long', hour12: true})
    + ".  It's "
    + new Date().toLocaleTimeString('en-US', {hour: 'numeric', minute: 'numeric'})
    + "."
  //console.log(say)
  exec(`espeak -ven-us+m2 -s115 "${say}" --stdout | aplay -D plughw:1`)
}
function doPixel(buttonName) {
    if (buttonName === 'right') x += 1
    if (buttonName === 'down') y += 1
    if (buttonName === 'left') x -= 1
    if (buttonName === 'up') y -= 1
    if (x > opts.width-1) x = opts.width-1
    if (y > opts.height-1) y = opts.height-1
    if (x < 0) x = 0
    if (y < 0) y = 0
    oled.drawPixel([x, y, 1])
}
function clearScreen() {
  oled.clearDisplay()
  x=Math.abs(opts.width/2)
  y=Math.abs(opts.height/2)
  oled.setCursor(0, 0)
  doPixel()
}
function halt() {
  exec('sudo halt')
}
I2C Display NOT included – 100s available on eBay to choose from! Condition is “New”. Shipped with USPS First Class.
If you buy this board, please comment below and share pictures and stories of how you use it! So excited to see how you enjoy it!
$12.99
US SHIPPING
